Streamline your domain control with Bragghost’s DNS Management—ideal if you don’t have hosting with us or prefer to manage DNS directly in your account.
Important: DNS Management works only if your domain uses Bragghost’s DNS nameservers instead of the web hosting nameservers. (If you use cPanel nameservers like ns1.bragghost.com and ns2.bragghost.com, manage DNS via cPanel’s Zone Editor.)
This article shows you how to enable and use DNS Management without a web hosting account (cPanel).
1) Enable DNS Management Add‑on
- You can enable this either during domain registration or later:
-
Log into your Bragghost Account.
-
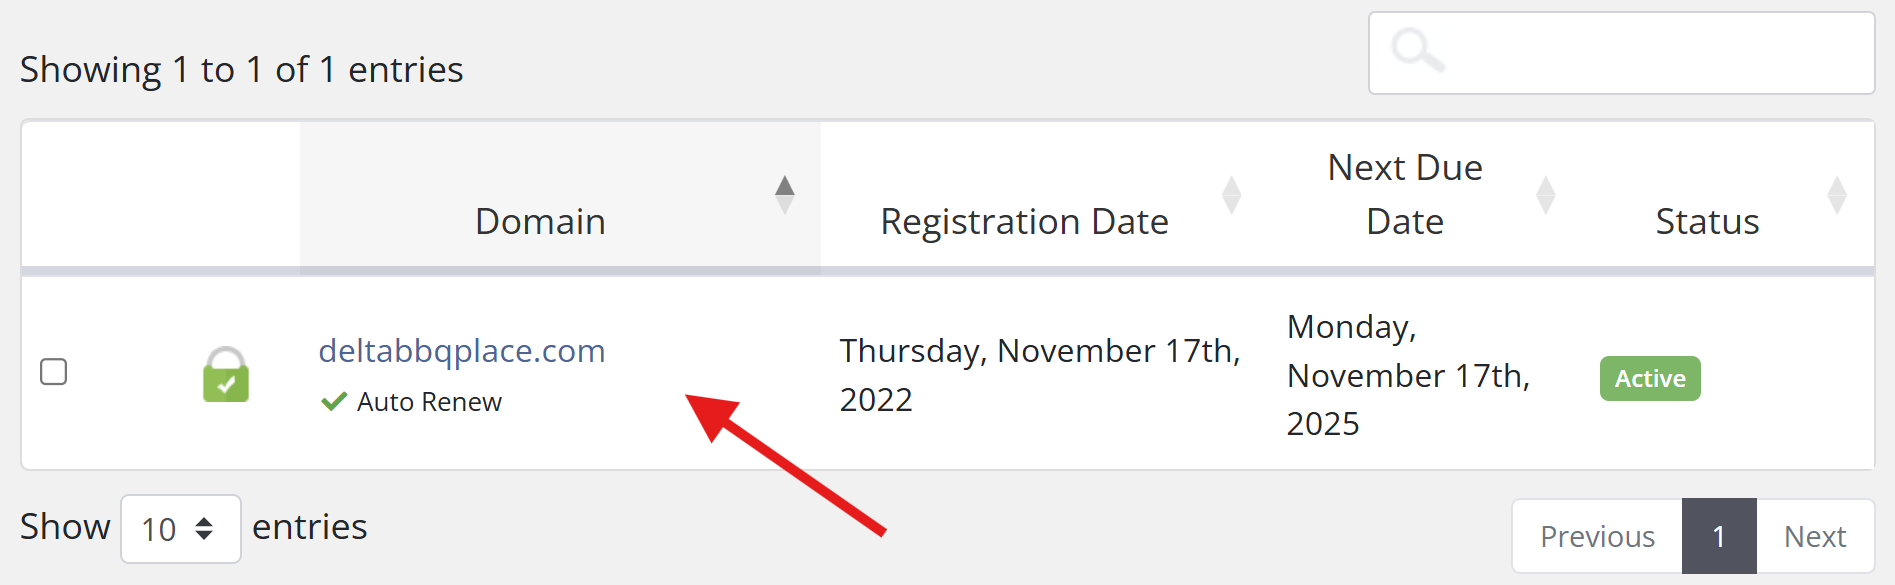
Navigate to Domains → My Domains, and click inside your domain’s row (not the text link) to open domain settings.
-
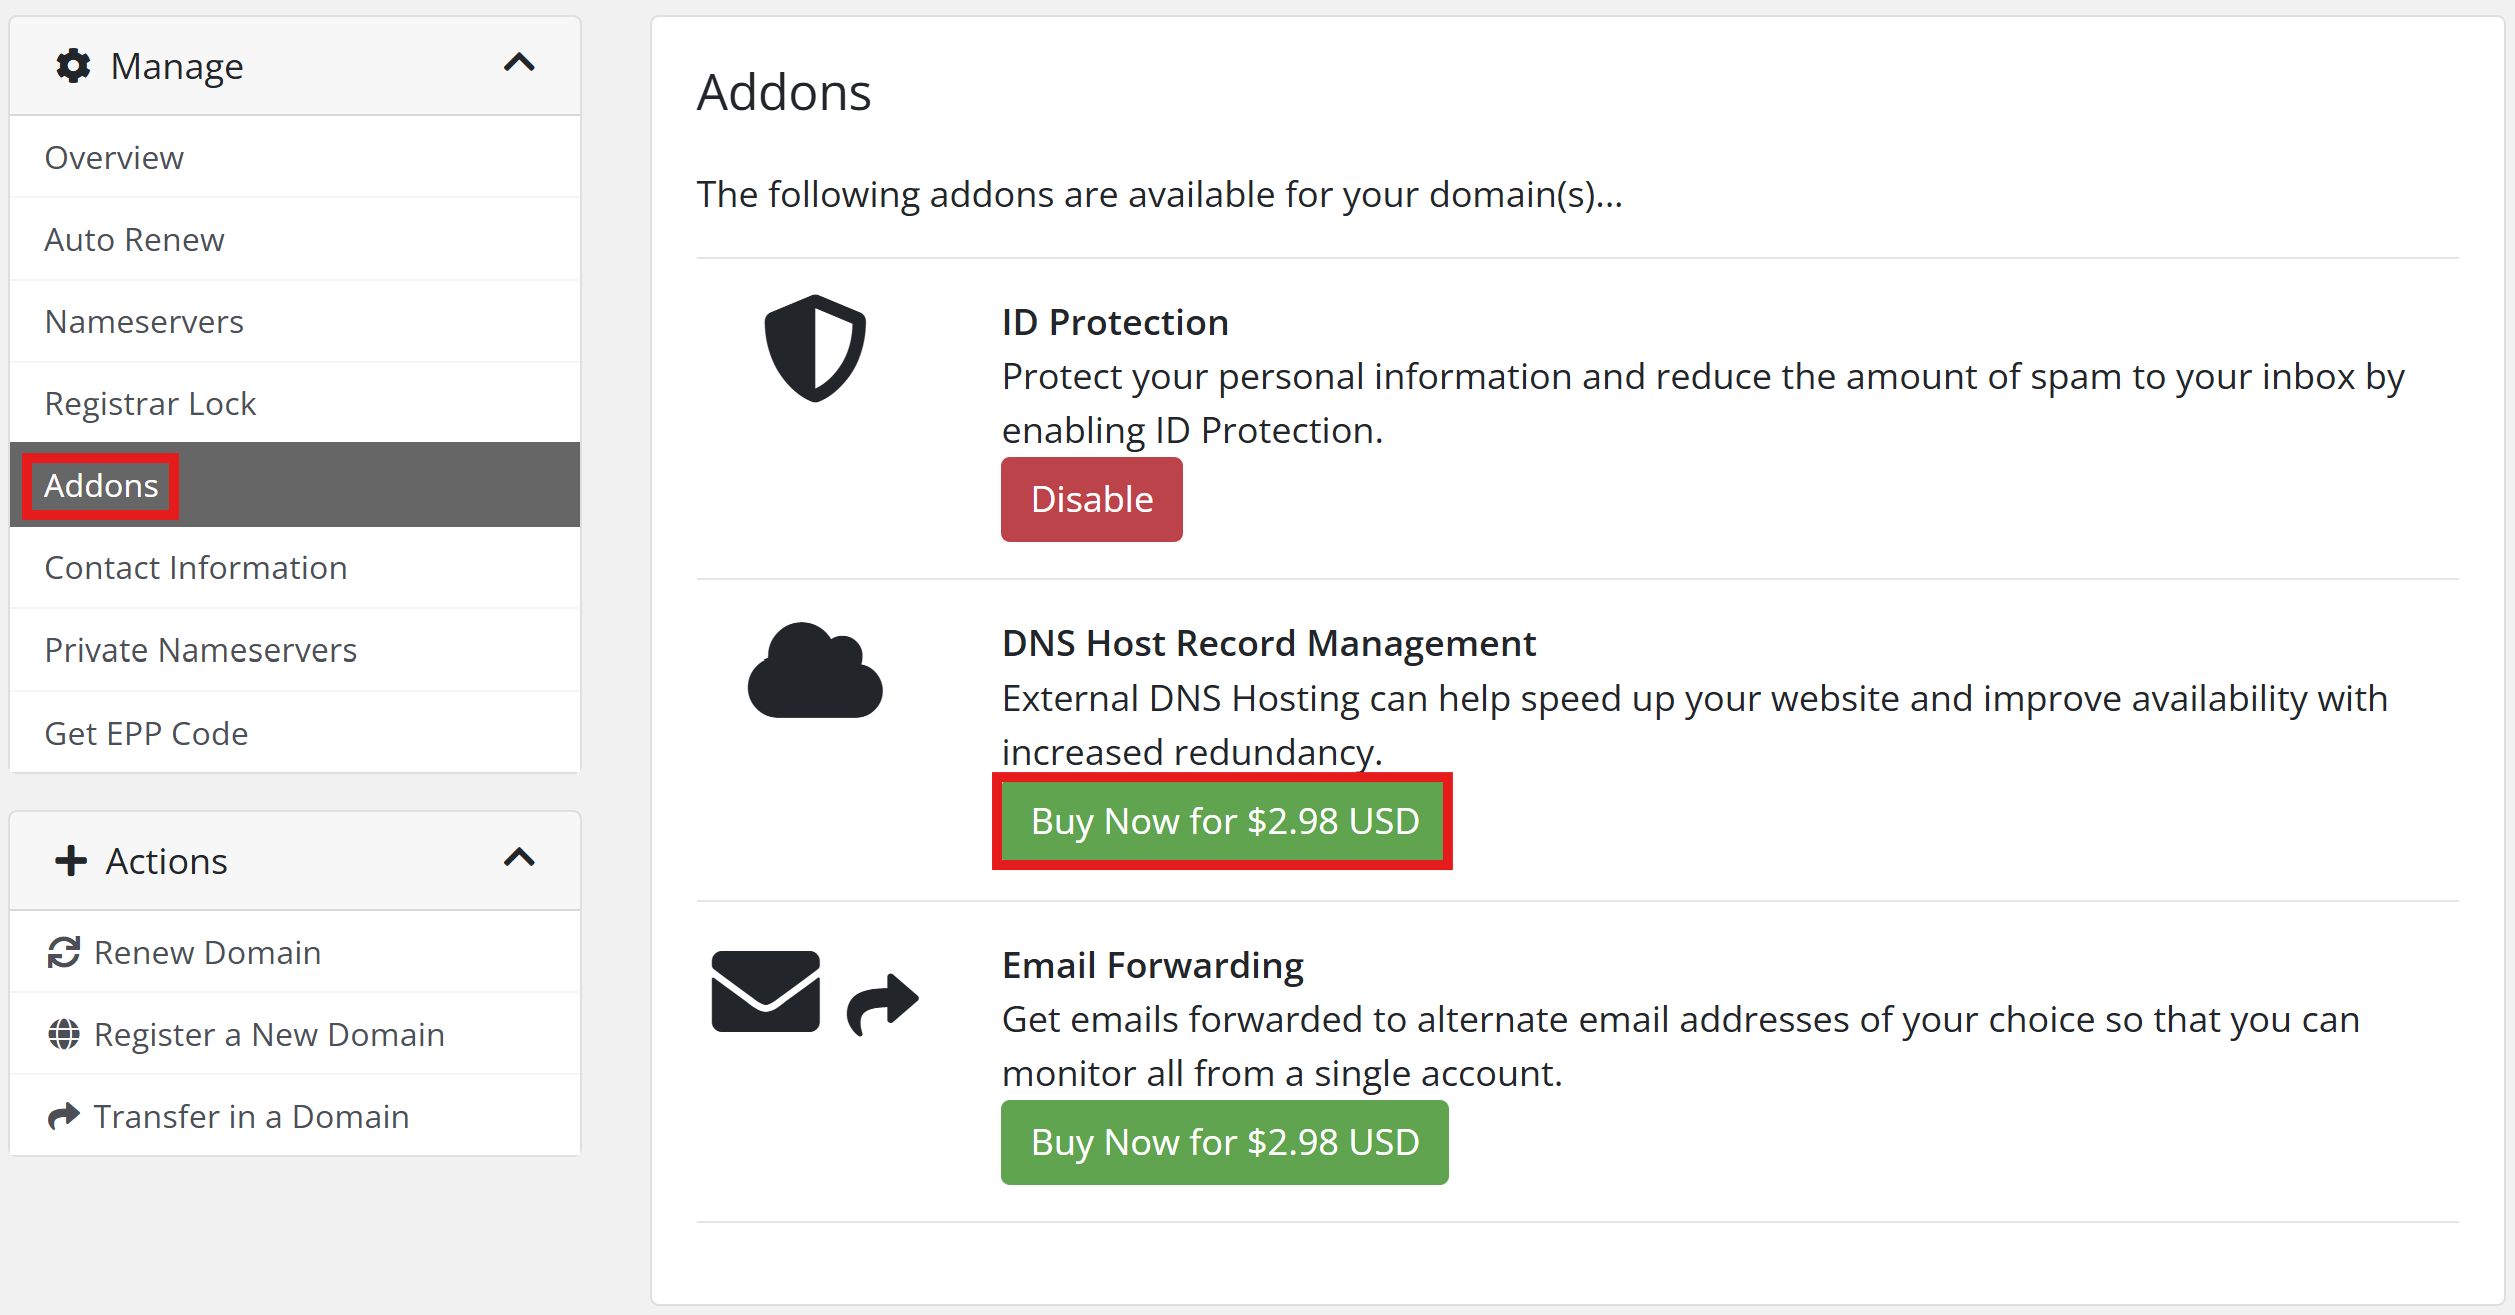
2) On this page, under the Manage menu on the left side of the screen, click Addons. Click the green Buy Now button under DNS Host Record Management.
3) Confirm Correct Nameservers
In the same manage menu, select Nameservers. Ensure your domain uses the following DNS nameservers in the screenshot below, which are for non-hosting related services.

You can copy and paste the below, for your convienience:
cont832563.earth.orderbox-dns.com
cont832563.mars.orderbox-dns.com
cont832563.mercury.orderbox-dns.com
cont832563.venus.orderbox-dns.com
4) Allow for Propagation Time
DNS changes can take up to 24 hours to propagate globally. Within the U.S., updates may apply in a few hours—but international propagation could take nearly a full day.
5) Access DNS Records
Once your DNS Management is active and nameservers are set, go to Domains, select the domain name (click the section, not the URL), then click DNS Management to start adding, modifying, or deleting records.
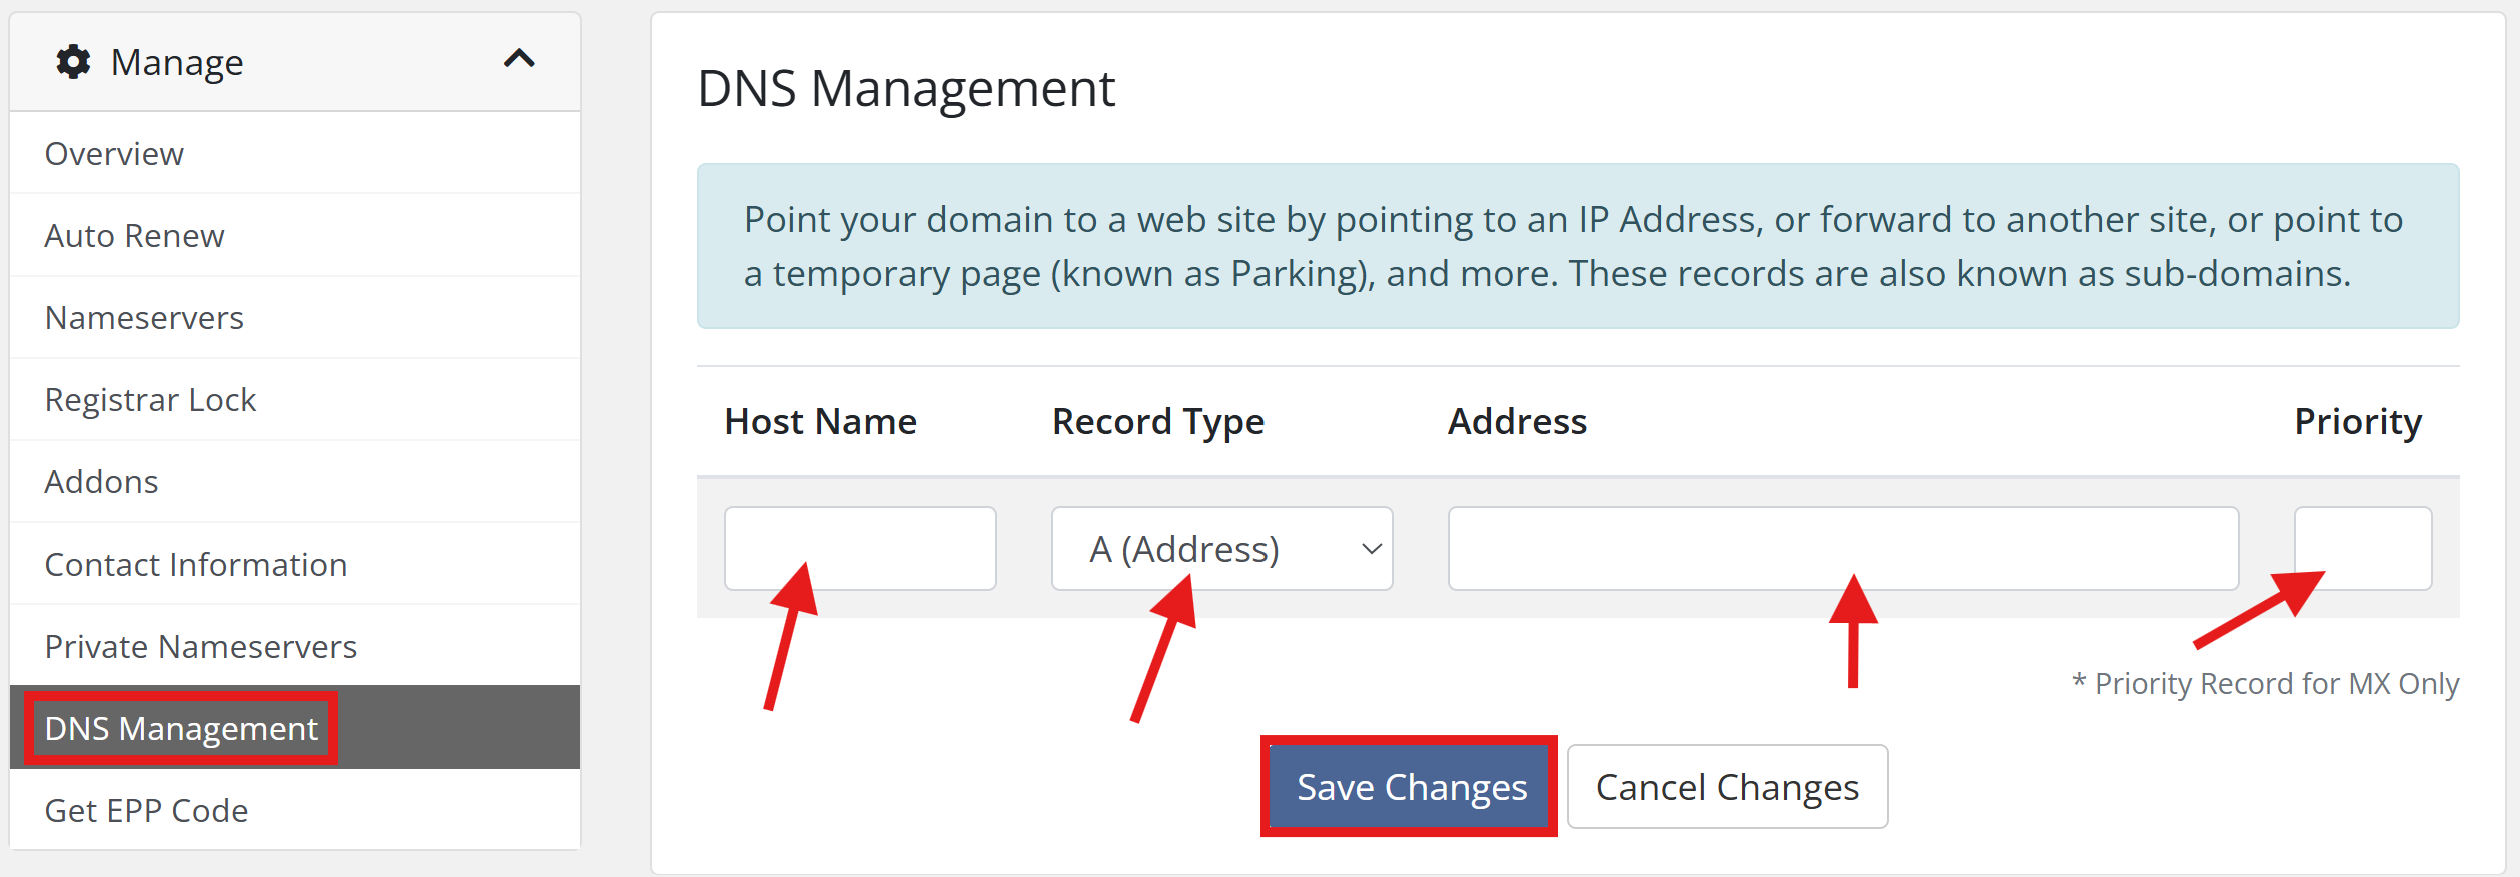
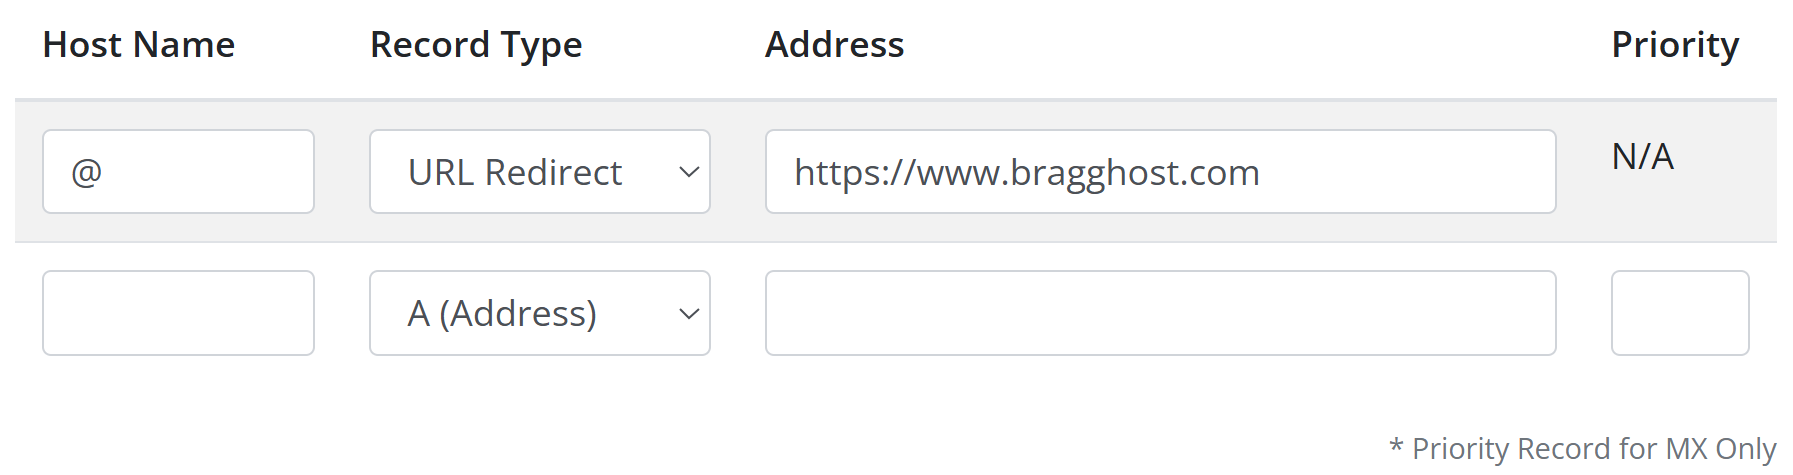
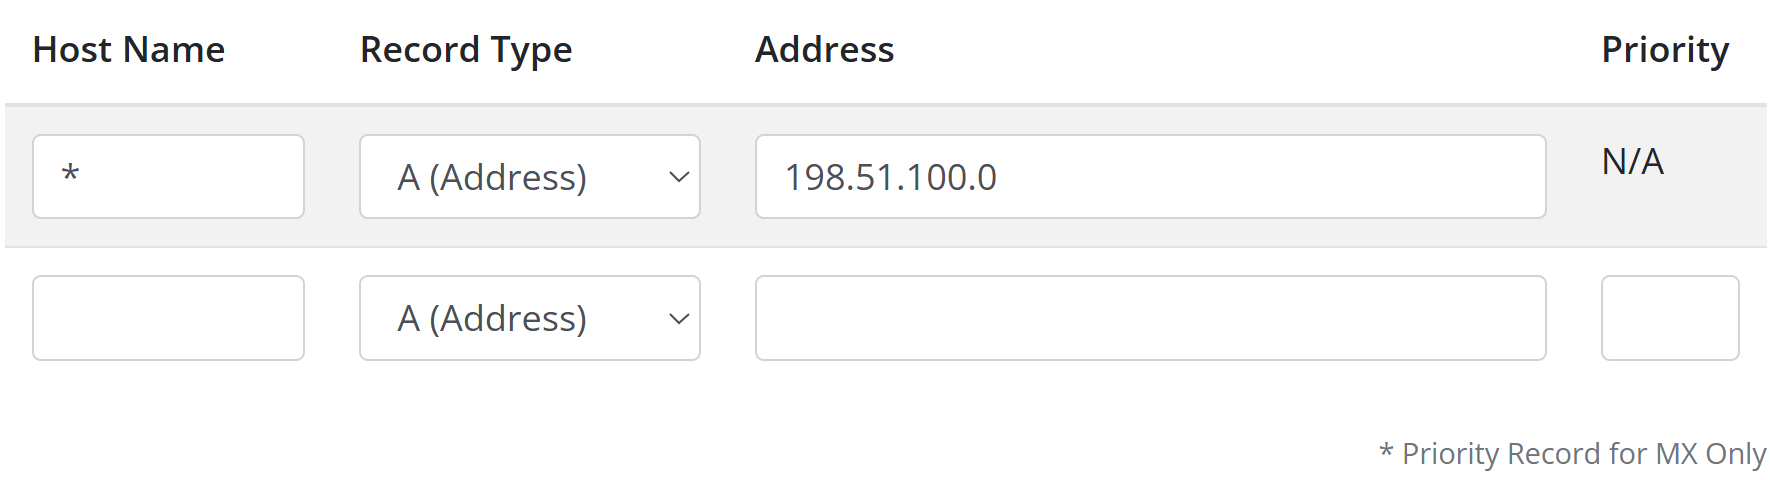
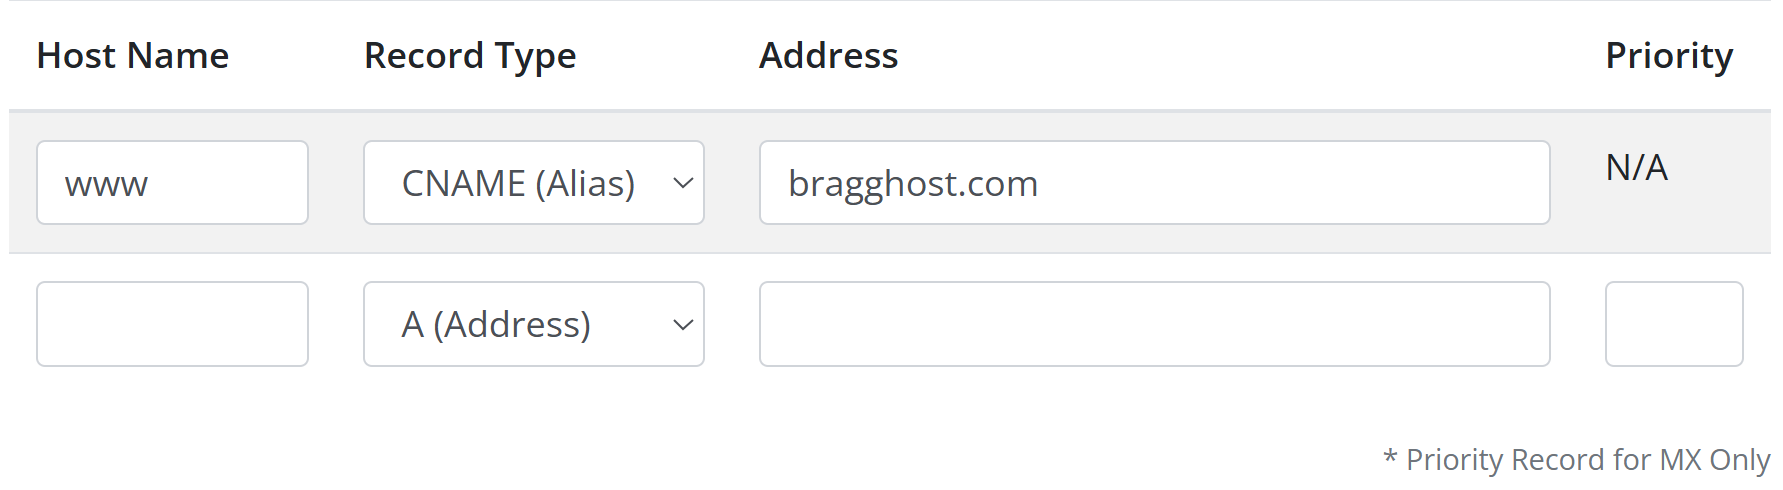
Below are some of the most common DNS host records:
- Use wildcards like
*or@to simplify record coverage.
Redirect your domain to another URL.
 Point your domain at a web host by using an A or CNAME record.
Configure “www” as a CNAME alias.
If you need any help setting up your DNS host records, please feel free to submit a help desk ticket and someone from our team will assist you!
