A subdomain is a subsection of your website that can exist as a new website without a new domain name. Use subdomains to create memorable URLs for different content areas of your site.
For example, you can create a subdomain for your blog that is accessible through blog.yourwebsite.com.
Check DNS Records
Before getting started, it's important to check your DNS first. Are you using Bragghost DNS servers or external DNS servers? If you are using Bragghost DNS servers, you are good to go and everything will provision correctly. If you are using external DNS server, such as with a CDN like Cloudflare or QUIC.cloud, you will need to duplicate the new DNS records for the subdomain and enter them into the external DNS provider for it to work.
How to Create a Subdomain
The following steps will show you how to setup a subdomain.
1) Login to your Bragghost account
2) Access cPanel
3) Once in cPanel, scroll down under Domains and click Domains.

Then click Create A New Domain.
4) On the Domains page, enter the complete subdomain and root domain (ie. subdomain.yourwebsite.com) and define the Document Root folder. Under "Document Root (File System Location)," make sure the box next to "share document root" is unchecked. For this example, we’re going to call ours blog.deltabbqplace.com. After this is done, click Submit.
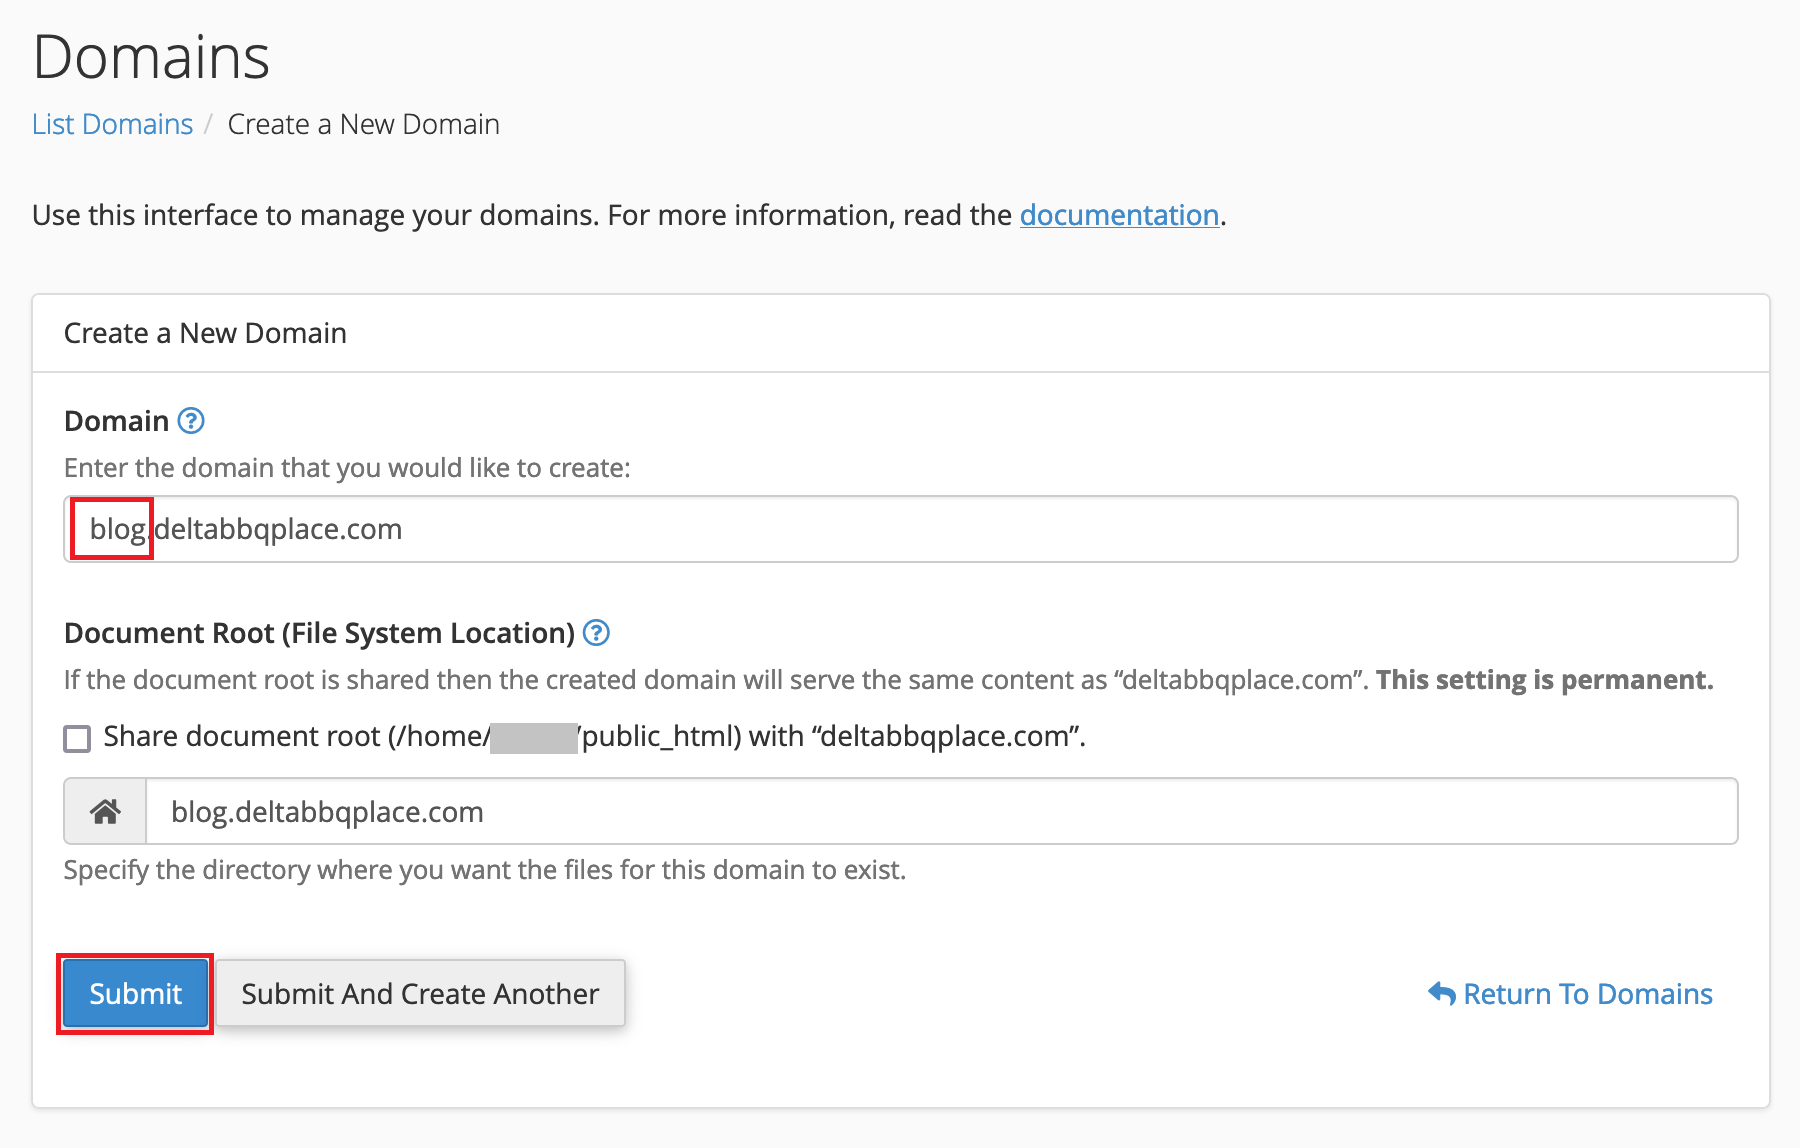
Once you click Submit, it may take up to 24 hours for the DNS records to fully propagate.
5) The subdomain is now setup and can be viewed blog.deltabbqplace.com.
Additionally, a directory with the subdomain folder has been created where you put the Document Root folder. Ours has it's own root directory at blog.deltabbqplace.com. This can be viewed via File Manager or FTP.

How to Install WordPress
Once your subdomain is created, if you want to install WordPress on it, you can easily do so using Softaculous in cPanel.
- Log in to cPanel
- Click WordPress Manager by Softaculous in the left sidebar or within the software section of cPanel.
- Click Install
- Under "Choose Installation URL" choose your subdomain from the dropdown list.
- Fill in your site details, and click Install. Your WordPress site will then be live on the subdomain you created.
How to Setup SSL On Your Subdomain
All hosting accounts at Bragghost come with free and AutoSSL through Let's Encrypt, which usually includes your subdomains. However, if you just setup your subdomain it's possible the SSL certificate hasn't automatically installed yet. To make this work, the DNS records must be propagated so the Let's Encrypt module can verify domain identification.
If you'd like to manually try to run it, you can follow these steps:
- Login to cPanel
- Under the Security section, click SSL/TLS Status
- Check the box next to the red beside the subdomain (as noted in the screenshot below).
- Click Run AutoSSL
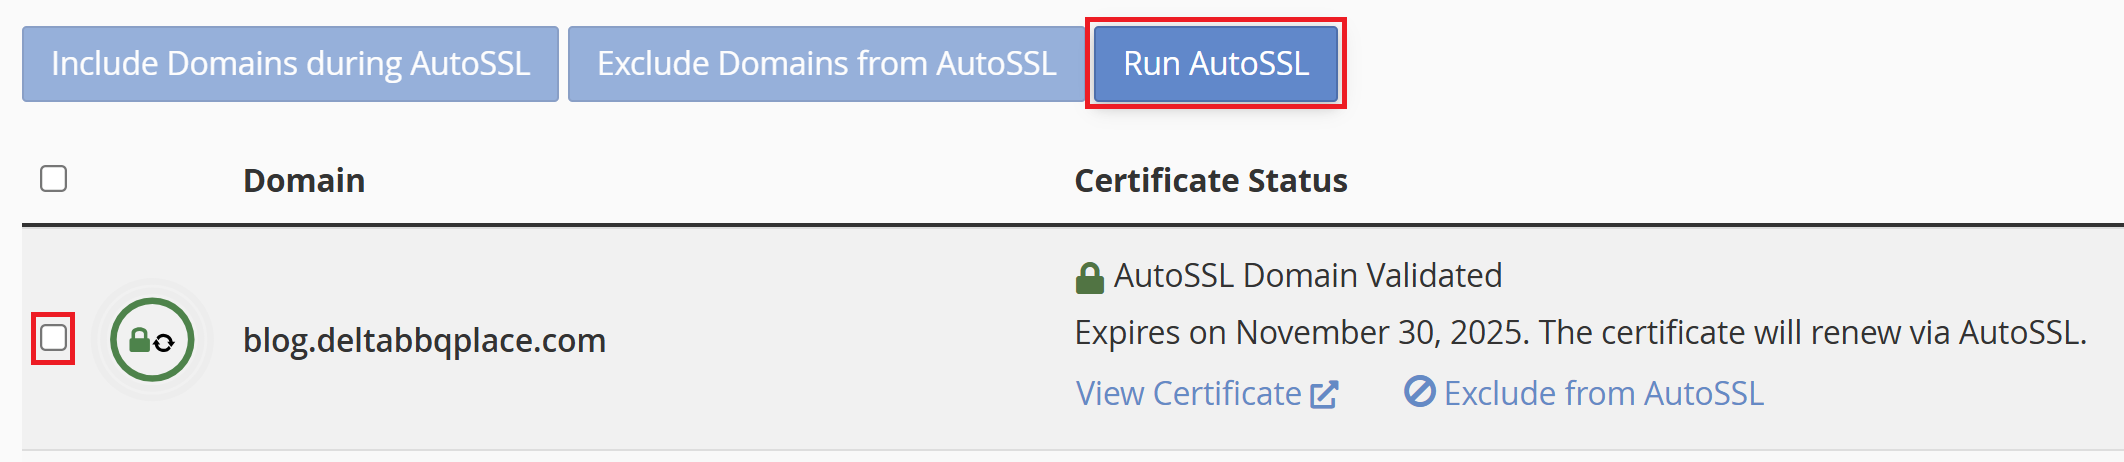
This will attempt to force run the AutoSSL module. It takes a few minutes to run, so just set and let it do its thing. If it fails, it's likely you need to wait another hour or two for the DNS to propagate. This process should be automated if waiting 24 hours or more.
How to Manually Add Files To Your Subdomain
If you don't want to install WordPress on your subdomain, you can manually upload your files through an FTP program such as Filezilla. The easiest way though is to do so through File Manager:
- Login to cPanel
- Click on File Manager (Files section)
- Navigate to your subdomain's document root
- Click the Upload link at the top
- Upload your files
You can also manually create files by clicking + File or + Folder on the top menu. This is especially helpful if you're just wanting to create a basic HTML page.
How to Remove A Subdomain

Removing a subdomain is pretty easy, but there are a couple steps you need to take into consideration:
- Login to cPanel
- Click on Domains
- Click on Manage beside the subdomain
- Click the Remove Domain button as shown above
- If you installed WordPress using Softaculous:
- Go back to the main cPanel page
- Click on WordPress under Softaculous Apps Installer
- Under "My Apps" click the Red X to remove
- If you manually installed your files:
- Go to the main page of cPanel
- Click on File Manager
- Navigate to the document root of the subdomain
- Delete the folder
That's it! Your subdomain has successfully been removed. It's important to remember, just deleting it inside of cPanel removes the DNS entries, but not the actual files/folders.
