Adding funds (a credit or “pre-balance”) to your Bragghost account lets you pay upcoming invoices more easily, avoid multiple small payments, and ensure your services stay active without interruption. This guide shows how to add funds, where those funds go, and what you should know.
1) Log in to your Bragghost Client Area.
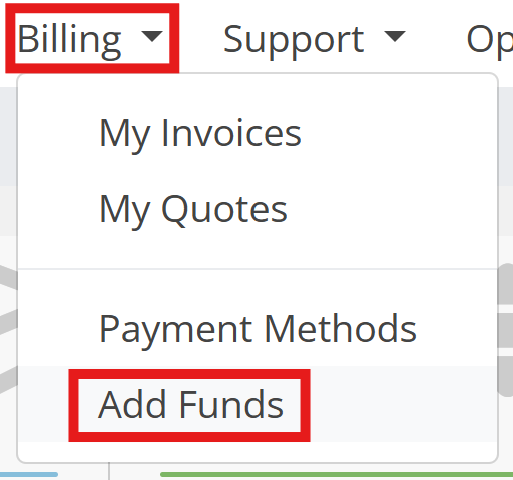
2) From the main menu, under Billing, click “Add Funds”.
3) Enter the amount you want to add to your account balance, then click Add Funds.

5) Select a payment method and complete the transaction. Choose from the supported payment methods (credit card, etc.), then confirm / submit your payment.
6) After payment, you’ll be shown a confirmation page and given an invoice (or receipt) for your deposit. The current balance of funds credited to your account will appear under Notifications, at the top left of your screen.

Important Notes
-
Non-Refundable: Funds added are non-refundable once deposited.
-
Automatic Usage: Your account balance will be automatically applied toward new invoices.
-
Processing Times: Some payment methods may take time to clear before funds appear in your balance.
-
Auto-Renewals: Having funds in your account helps ensure that domains and hosting renew automatically without interruption.
Frequently Asked Questions
-
Can I add a small amount, like $5?
The minimum requirement is $20. -
Where can I see my current balance?
Your balance appears in the Notifications section of the Client Area after logging in, at the top left of your screen. -
Do funds expire if I don’t use them right away?
No. Funds remain in your account until they’re applied to an invoice. -
What if my payment fails or is declined?
Check your payment details, try again with another method, or contact support for assistance.
