
Overview
FTP stands for File Transfer Protocol. Using an FTP client is a method to upload, download, and manage files on your Bragghost hosting account. A more secure version of FTP is SFTP (Secure File Transfer Protocol) or FTP over TLS, which encrypts your connection and is the recommended option.
In this guide we'll walk you through configuring FileZilla, one of the most popular and widely supported FTP clients available. FileZilla is free to download and works on both Windows and Mac.
Download FileZilla: https://filezilla-project.org/download.php
What You'll Need
Before getting started, make sure you have the following information handy. You can find these details in your cPanel account:
- FTP Host — your domain name (e.g.
yourdomain.com) - FTP Username — your cPanel username
- FTP Password — your cPanel password
- Port — 21 for FTP, or 22 for SFTP
Tip: You can find your FTP credentials in cPanel under FTP Accounts. Your primary FTP account uses your cPanel username and password.
Note: This guide covers connecting using your primary cPanel credentials. If you need to connect using a separately created FTP account, your username will be in the format
username@yourdomain.com.
How To Configure FileZilla
Step 1: Open FileZilla and go to Site Manager
Open FileZilla on your computer. In the upper left corner click the Site Manager icon or go to File → Site Manager.

Step 2: Create a New Site
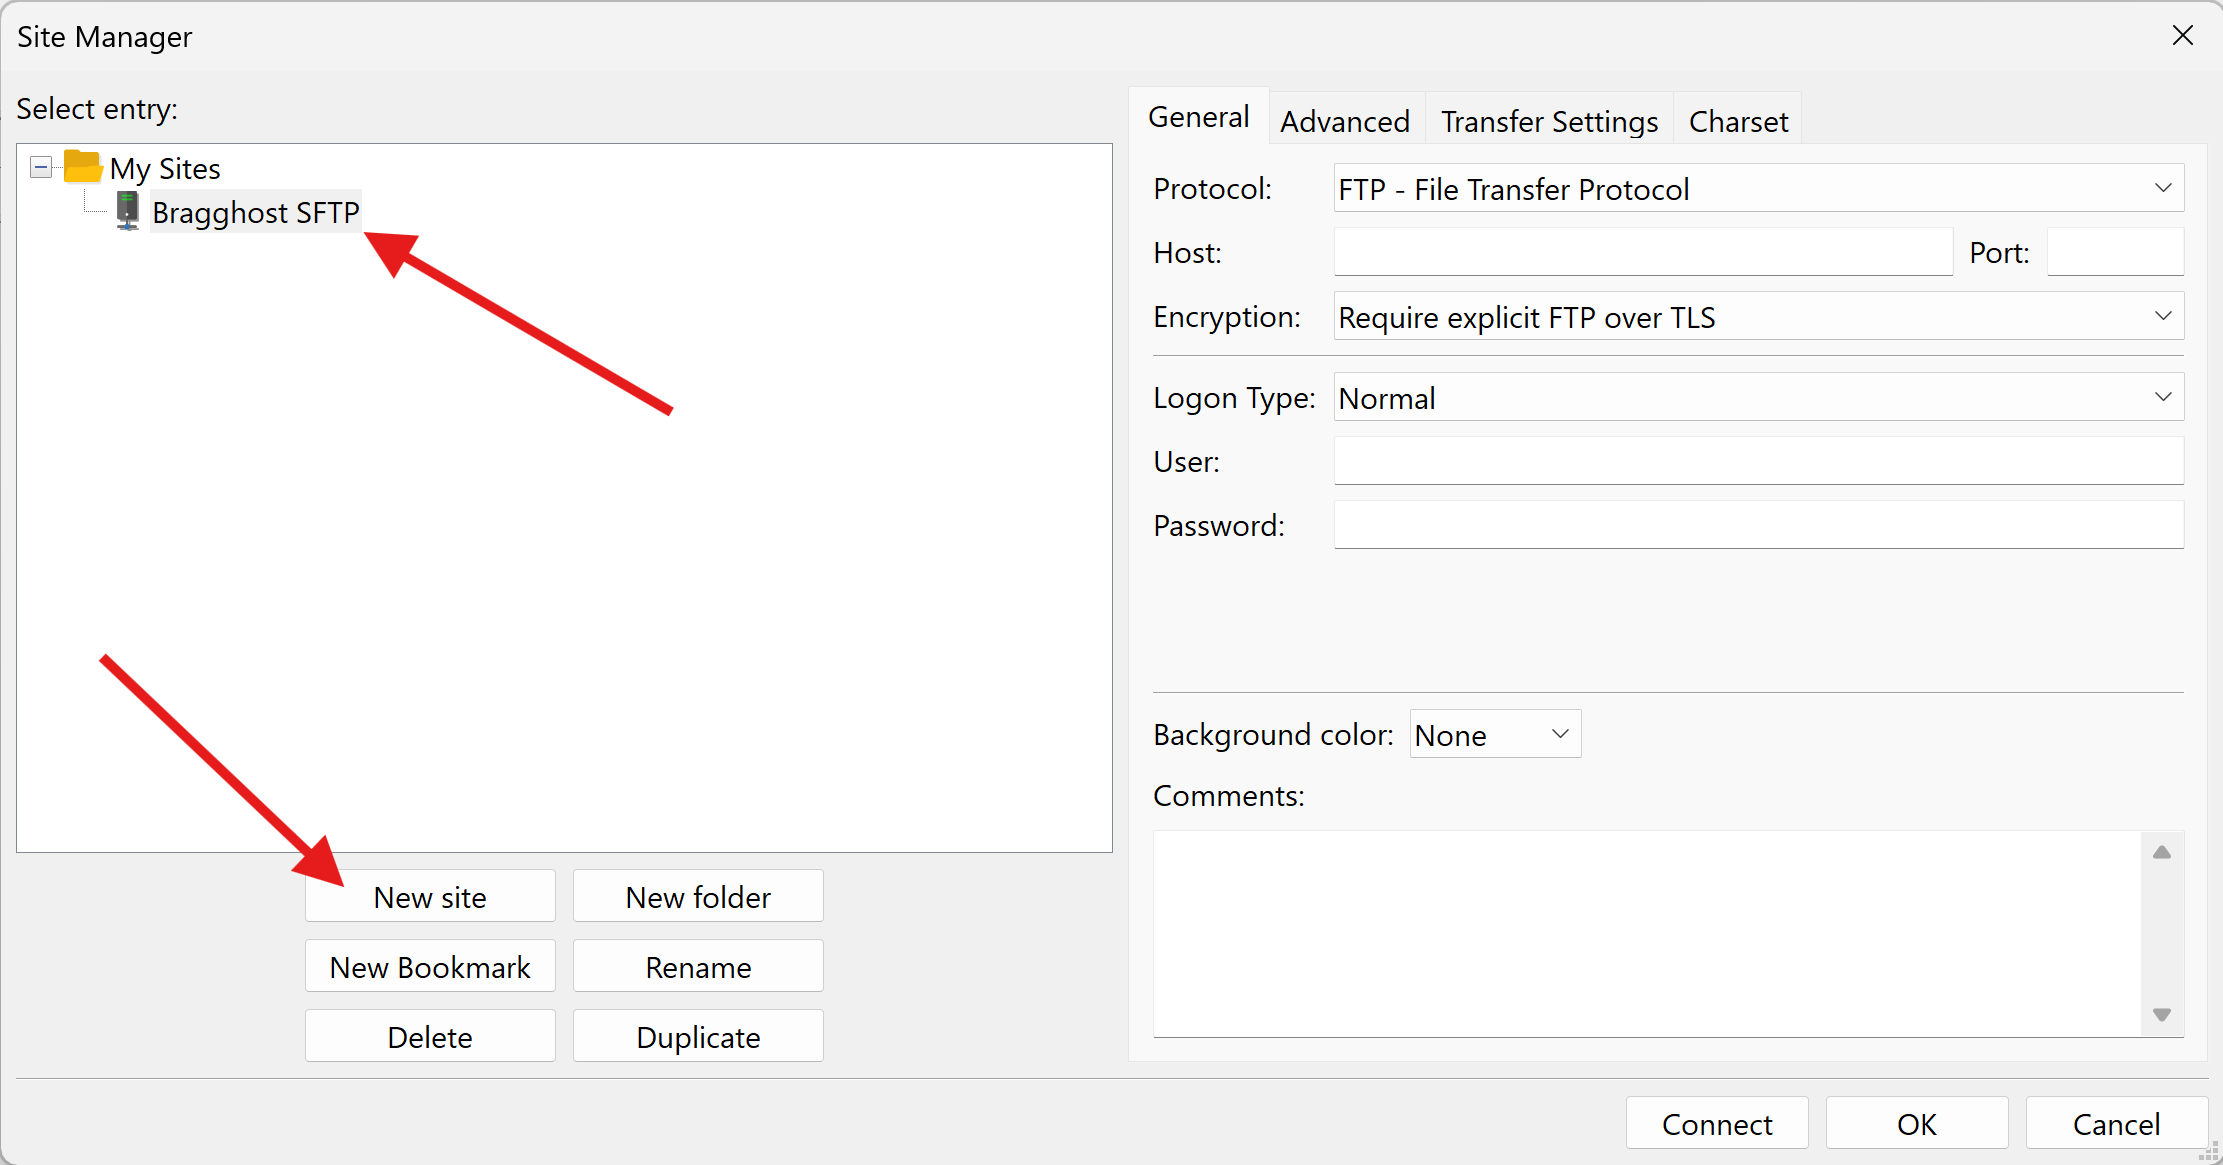
In the Site Manager click New Site and give it a name, for example, "Bragghost" or your domain name.
Step 3: Enter Your Connection Settings
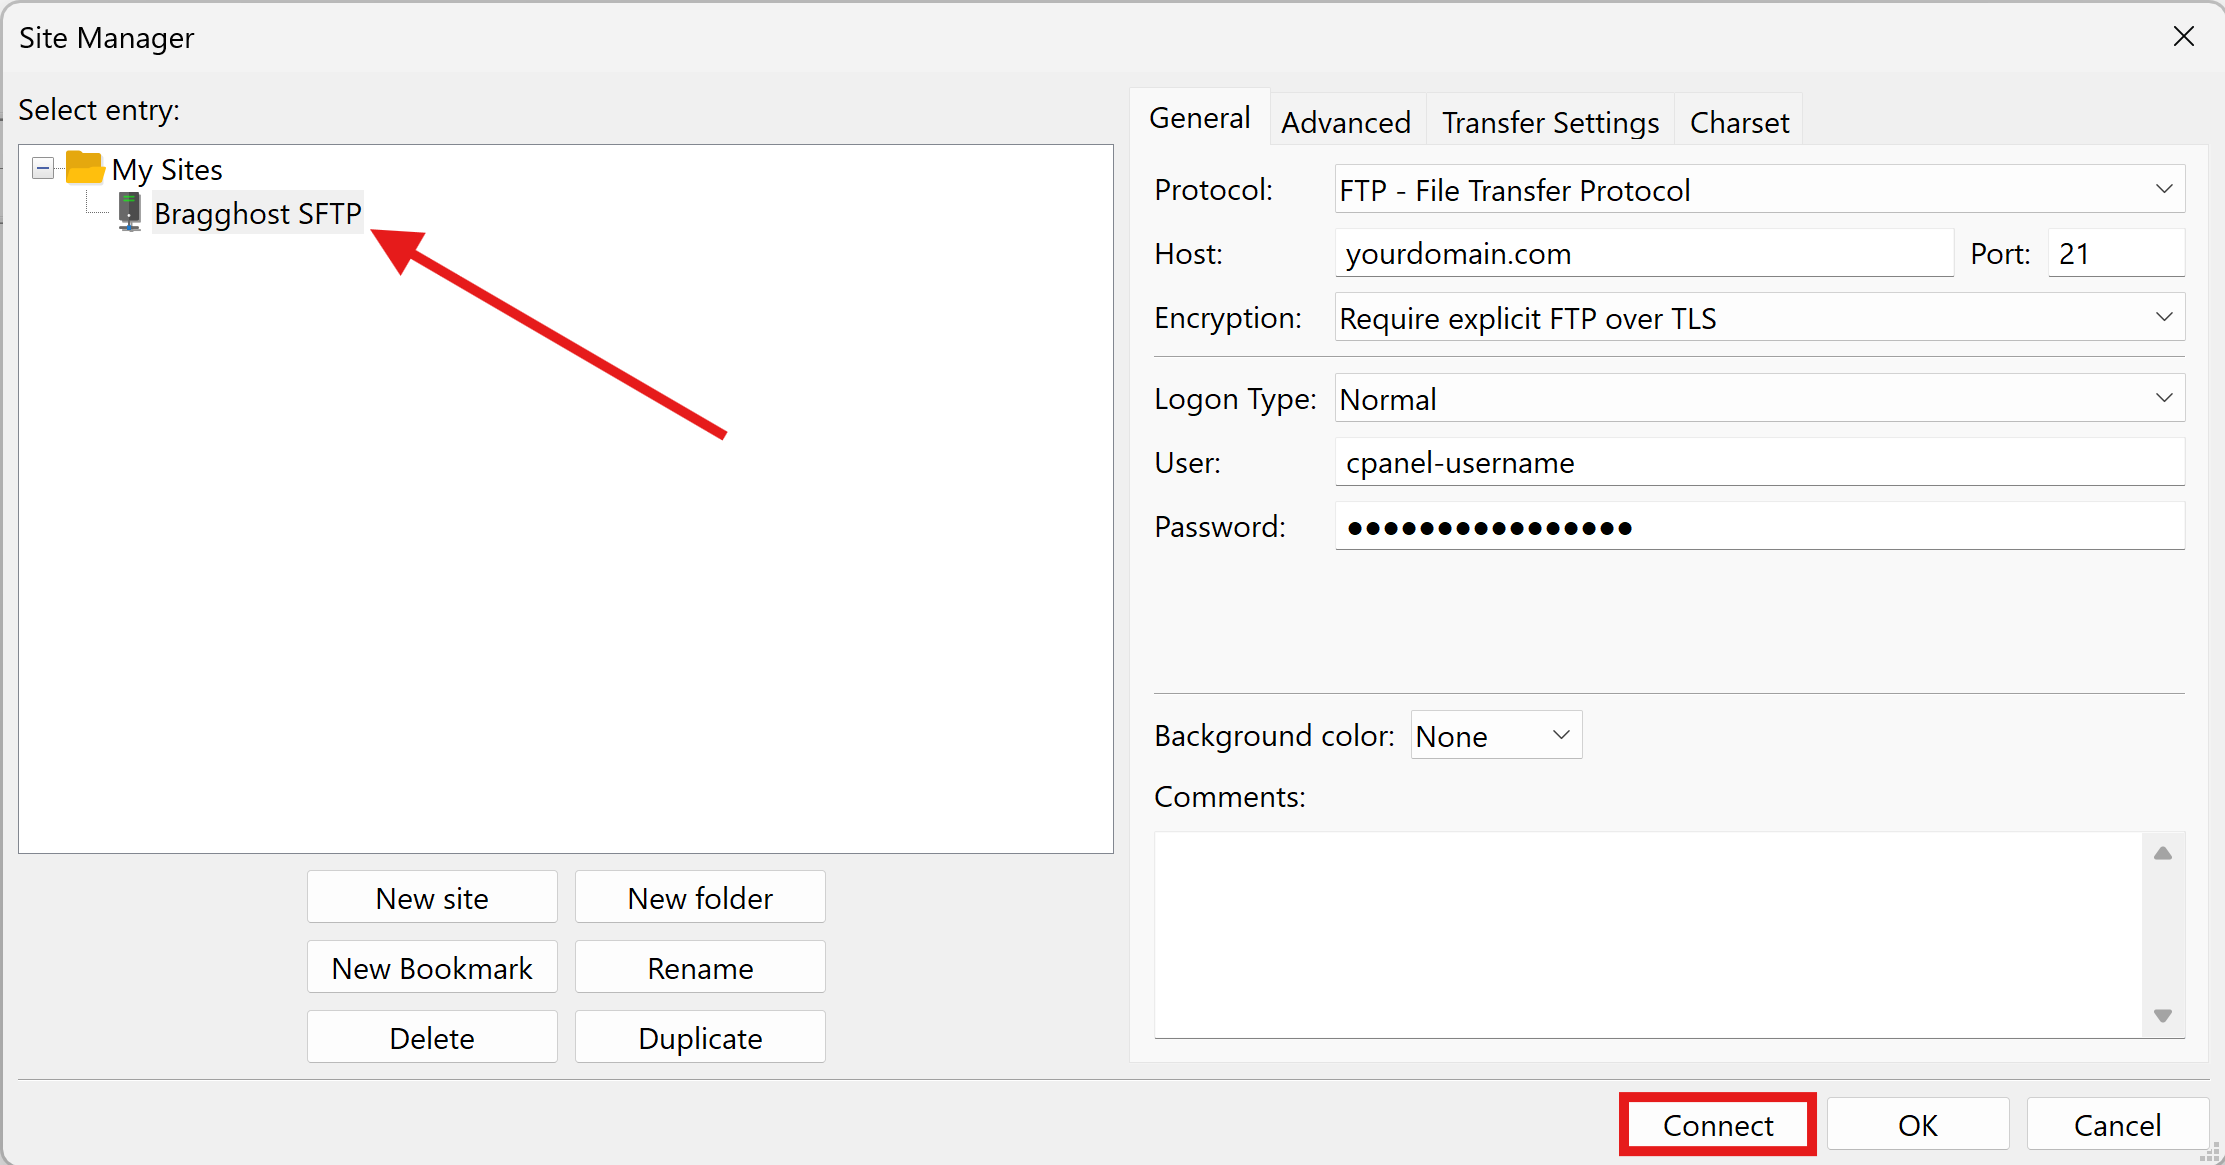
On the General tab enter the following settings, then click OK:
- Protocol: FTP - File Transfer Protocol
- Host: your domain name (e.g.
yourdomain.com) - Port: 21
- Encryption: Require explicit FTP over TLS (recommended)
- Logon Type: Normal
- User: your cPanel username
- Password: your cPanel password
Note: If your domain name does not work as the FTP host, please contact our support team and we will provide the correct hostname for your account.

Step 4: Connect
Go back to the Site Manager, select the site, then click Connect.
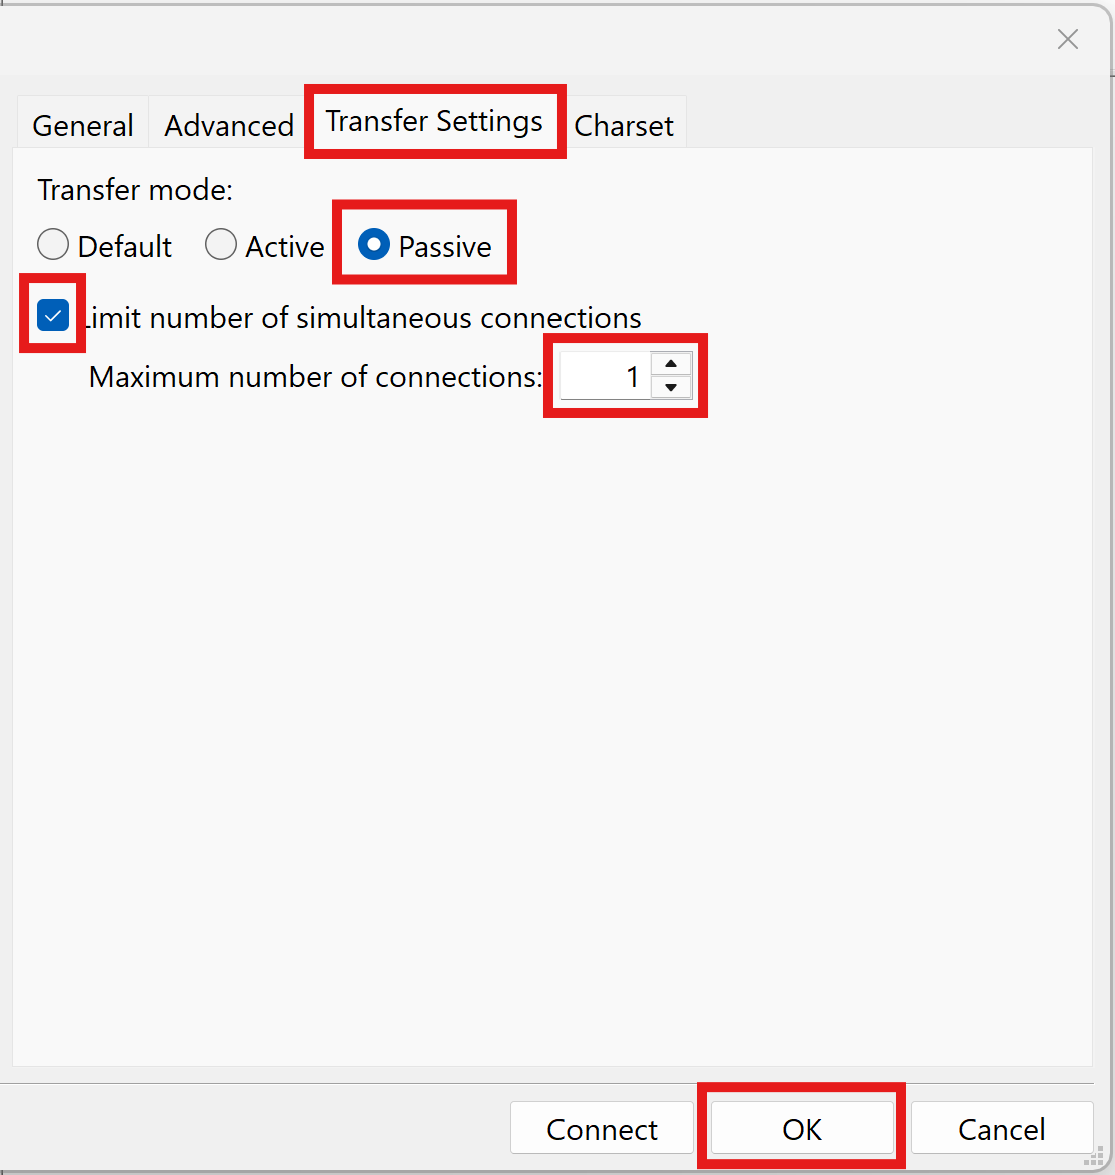
For most people, this will work. Under certain situations you may need to click into the Transfer Settings tab and adjust these settings.
Step 5: Accept the Certificate
Since we are using explicit FTP over TLS, on your first connection you will see a certificate pop-up. Check the box that says Always trust this certificate and click OK. You should now be connected to your hosting account!

Step 6: You're Connected!
Once connected you will see your local files on the left and your hosting account files on the right. Navigate to public_html on the right side to access your website files.
Troubleshooting
Connection refused or timed out:
Double check your hostname, username, and password. If your domain name doesn't work as the hostname, please contact our support team for assistance.
Certificate warning on every connection:
Make sure you checked Always trust this certificate on your first connection. If the warning persists, try reconnecting through the Site Manager.
Incorrect login credentials:
Your FTP username and password are the same as your cPanel login. If you're not sure what these are, you can reset your cPanel password by following our guide: How To Reset Your cPanel Password.
Intermittent connection issues:
If you connected successfully before but are having trouble reconnecting, try clicking into the Transfer Settings tab in Site Manager and set the Transfer Mode to Passive. Click OK and try connecting again.
Need More Help?
If you run into any issues our support team is available 24/7. Simply open a support ticket or use the live chat in your client area.
